When it comes to building a website, the more badass the software, the better. How much you can customize and personalize your site, making it stand out amongst the competition, is a marker on how successful your site will be.
Luckily for folks like you and I, remarkably dope platforms like Elementor are there to save the day, taking the stress away from the once complicated site-building process.
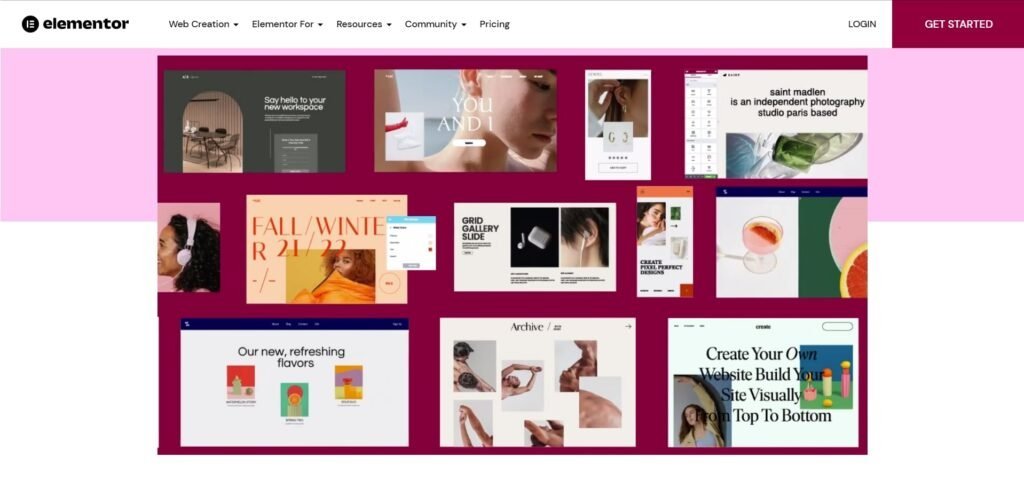
Elementor is a straight-up debo website builder, fueling over 10% of all known website CMS (content management systems).
If you’ve been wondering how to use Elementor (we’re sure you’ve heard the name), here’s your one-stop-shop.
The upcoming Elementor tutorial takes you through the process step-by-step – from the initial installation to the final finesse – so you can build your next kickass website with uninhibited confidence!
We’ve also got an in-depth video on the topic (look below) for all the visual/auditory learners out there. Be sure to check it out if our gentle written words don’t foot the bill for ya’!

What is Elementor WordPress plugin?
WordPress is probably the most reputable open-source platform used to build websites on the market these days. They’re without a doubt among the most worthy considerations for any soon-to-be website designer.
Fortunately, using Elementor with WordPress is just a piss away with the savvy Elementor WordPress plugin. In fact, we’d recommend it as one of the best WordPress plugins money can buy! (it’s free in base form though)
And we’re not the only ones who feel this way. In fact, Elementor is the leading web creation platform for WordPress.
With the Elementor plugin for WordPress, pixel-perfect websites can be edited with pristine precision and immense control. Some perks are it’s responsive live editing, dozens of free widgets and templates, and professional out-of-the-box features.
It’s simply a must-use website builder plugin for someone who wants the most out of their WordPress experience (for one who’s building a site, that is). We’ll cover all the fine details on how to add Elementor to WordPress a little later on.

Is Elementor free?
Elementor offers both a free version as well as a few paid subscription plans for customers. The free version definitely provides enough juice to build a beautiful website which allows for some basic template modulation, widgets, and drag-and-drop features.
Actually, the free Elementor page builder is more sophisticated and well-stocked than some other available pay-to-use options.
But of course, for the full-feature show with the theme builder, 24/7 live support, a large array of content, and all that other good stuff, Elementor Pro is the guy to see.
Before you install Elementor for a price, we always recommend trying out the free version just to get a more visceral feel of the interface and see how it flows with you, personally.

Can you use Elementor with any theme?
As of late Winter of this year, Elementor can be used with absolutely any WordPress theme. Many of the WordPress/Elementor compatible themes are only available with Elementor Pro by way of their Theme Builder feature, so full access is exclusive to Pro users.
What’s especially cool about Elementor’s Theme Builder is its unprecedented control over manipulation in your page builder. You can even override the preset WordPress themes, so basically, it’s free reign to do whatever the hell you want!
While any theme which honors the coding standards of WordPress will be compatible with Elementor, there are quite a few which were built especially with Elementor in mind. So your best bet is to find something that’s built to win and stick (or at least start) with that.
Can you use Elementor without a theme?
As it stands, you cannot use Elementor free or Pro without a theme. The reason is that the Elementor WordPress plugin is… well, meant to be used on WordPress. WordPress doesn’t allow for sites without a theme on the platform.
That being said, Elementor does have a very basic Hello Theme which is just a blank-slate template that can be added to and fitted to one’s liking. You can also buy a blank template for that matter.

How to Use Elementor WordPress Tutorial Step-by-Step
With the basic and most important FAQs out of the way, let’s start our step-by-step Elementor WordPress tutorial.
In this tutorial, we’ll show you how to build a balls-deep pro website from scratch, including how to get started with the software in the first place. Then, we dive into all the most important sections and widgets you might need for your site.
So open up your laptop, put your “get shit done” cap on, and let’s start the tutorial!

Step 1: Get Your Domain Name & Web Hosting
Let’s get things crackin’ first and foremost with a custom domain name and web hosting plan for your website. Now, a domain name is just the address to your website and what people must enter into the address bar when they want to reach your site.
Technically you can put up a free website, but it comes with a bunch of limitations, the most concerning being that you don’t actually own your website. That means “your” site is in jeopardy of being deleted or modified at any time without your notice or approval.
Not to mention, you won’t be able to upload new themes for full-throttle customization, nor will you be able to upload plugins to increase your site’s functionality. And you won’t be able to monetize with ads on your site.
For all these reasons, it’s imperative to get a domain name for a website before you take flight.
A web hosting service (as the name implies) hosts your site or provides online server space from where your website stores all of its important media files.
In a way, web hosts are like landlords of the net – and as we already know, landlords can either make your life fairy dust or a shit show. So it’s important to get a web host that actually picks up when you call.
Here at Createaprowebsite, we recommend Hostinger as a first-stop web host – it’s the best we’ve found so far. The extensive features, sleek dashboard, and buttery interface complement both beginners and experts alike.
That being said, there are other superb web hosts out there, such as HostGator, which we’ll be using for this tutorial. To start using HostGator as your website host at a major discount, use the link in this sentence to find your perfect plan.
If you’re just getting started building a website, use the Hatchling Plan, as it’s the cheapest and offers everything you need to get a site off the ground.
So let’s get into it:

Once you choose your web hosting plan, you’ll be asked to choose the domain name for your site. Most paid web hosts offer a free domain name, so you won’t have to go buy a separate one (which is also possible).
On Hostinger, type in the domain name you want. If that name is available it will highlight green; if unavailable, it’ll highlight red. You can also choose a domain name you already own if you’re ahead of the game.
Oh, and you’ll be able to pay more for a more fancy domain name, like a “blahblah.club” or something, but since “.com” sites are the most common and professional-looking, we’d recommend sticking with that.

Then you’ll have to finalize your hosting plan and enter in some account information, which is just an email address and account password. After, you’ll put in all the payment information.
Keep in mind that when you’re choosing the duration of your hosting plan, it might be easier to keep it active for at least one year since you’ll be sponsoring a domain for one year as well. And remember, the longer the contract, the cheaper the deal.
As for step 4, Add Additional Services, we recommend unchecking the SiteLock Essentials and Site Backup boxes since we show you how to do that for free in some of our other videos.
Check here for how to backup a website, and here for how to secure your site from hackers.
Lastly, before checking the final details and agreeing to the user terms, make sure you’ve got our affiliate link coupon code in the discount section! We make a bit of money from the commission and you save tons on your hosting plan, so it’s a win-win on both sides.

Finally, hit the checkout and wait a few minutes for Hostgator to create your website. And once that happens, we can start the fun process of building out our website! On the completed order screen, hit the big blue “view your dashboard” button to head to the face of your site.

Step 2: Install WordPress
The next step is to install WordPress on our website. The first and most easy way is to find the install WordPress link on your website’s dashboard.
The other way to do this is to click on Hosting in the left side menu before clicking manage under whichever domain you’ll be working with. Then at the top is a button you can use to install WordPress.
Click through the “install” buttons until you reach a page with the software setup. Make sure to install the most up-to-date version, and that you’re doing so under the correct domain name. Here you can also choose the name of your site, as well as the site description.
This site description is what pops up under a website’s URL after a Google search–make it something catchy that accurately describes the products and services of your business.

After that, enter in the details for the Admin Account. This is an important section because you’ll need to enter this information every time you access your website.
Finally, you can choose your language, as well as some more advanced options like themes and plugins.
These are just options that will help you install a little faster and move along in your work before you even get to your dashboard, but we’re gonna show you how to do all of this step by step.
So hit “install” way down and the bottom and in a bit, you’ll see that we’ve successfully installed WordPress to our website. Nice!
On that confirmation page, you’ll see something referred to as the Administrative URL. This is just your actual URL with a shortcut for you as the admin.
It’ll have a “/wp-admin” after the URL. You can either remember this or bookmark this in a new tab for whenever you want to shortcut to the motherboard of your site.
Quick Tip: Due to something known as propagation your new site might not pop up immediately upon input. Propagation means that your web host is sending your newly registered and owned website to all servers everywhere across the entire globe. This process can take anywhere from a few minutes to 24 hours!
After your site has propagated and is ready, follow this administrative URL to the login page and enter your login credentials. And voila! You now have access to your new WordPress website!

Step 3: Install a WordPress Theme
To see what your website looks like with its current theme, you can click on the home icon in the top left which should have the name of your website nearby. It should appear very banal and boring – but we’ll be spicing that up in a moment.
In order to install a theme on WordPress, go over to the left-hand side menu, go down to appearance and click on themes. You might want to open this page up on a new tab.
Click on the big blue add new theme button to find all the themes – they’re tons to choose from, all of which can be chosen and previewed. We’ll be using the super awesome Astra theme for this tutorial.

To use the Astra theme for yourself, just search for it in the search bar. Once you’ve chosen your theme, make sure it’s marked as active on your website.
And that’s how to install a theme on WordPress! Easy as pie!

Step 4: Install Plugins on WordPress
In case you’re unsure, you can think of a plugin as downloadable software that adds functionality to your website. When you move to add a new plugin from the plugins tab in the sidebar of your WP dashboard, you’ll find a bunch of different ones to choose from.
You can think of this page chock-full of plugins as an app store on your phone and each plugin as an individual app – except in this case, they’re apps for your website.
So from the plugins page is where we’ll discover how to use Elementor in WordPress. Actually, it’s as easy as searching for Elementor on this page, and installing it directly to your WordPress site!
After installing and activating the Elementor Website Builder (the Elementor software itself), go ahead and install the Elementor add-ons too. This sugar-sweet patch throws over 40 additional dapper plugins on your site for free!

The last steal we’re gonna snag from this plugins page is the Astra Starter Templates plugin, which offers hundreds of cool ready-made templates to use on your site. Again, for all of these, just install and activate.
Oh, and once you activate the Astra starter templates, they’ll ask which page builder you want to use, so just make sure you click Elementor as your choice. Perfect.

Step 5: Customize Your Website
Now that we’ve learned how to install Elementor on our WordPress site, let’s begin the most anticipated customization process!
In order to start customizing, we need to add a page to be customized to our site first, so go over to pages and open it up in a new tab. A “privacy policy” and “sample” page should already be set up for you. You can move them both to the trash–let’s start with a fresh canvas.
So go up to the top and click on add page. For the title of this page, type in “Homepage” (since that’s where we should start). Additionally, change the template of the page to “Elementor Full Width” under the page attributes.
That basically declares that you want Elementor to take up the entire width of the page because Elementor is separate from Astra.

Lastly, click on Publish twice to save your work. And how the homepage is live! With that, we can begin to edit our page with the super-powerful drag-and-drop Elementor page builder (see the blue button at the top of your screen.
Go ahead and get underway, and you’ll see some small widgets centered in the editor. Among them, you’ll find all the Astra starter templates we downloaded earlier, plus some templates offered by the Elementor library.
In the blocks section, you’ll also find pre-built portions of websites that you can use for different parts of your own website. It just doesn’t get any more convenient than this!
You can also use the red plus button to create something from scratch, which we’ll be doing together in a sec. First, let’s talk a little bit about the way Elementor is laid out.

Elementor Page Builder Layout in WordPress
Elementor’s web page layout consists of sections, columns, and widgets. In plain terms, the sections are the background of your page, the columns organize the sections themselves, and the widgets are to be inserted within the columns. Columns in sections can be arranged in a variety of ways, too.
Widgets can contain everything from photos to forms to buttons – and remember, Elementor is a draggy droppy kinda pal, so getting widgets on the page is just a click n’ release away.
To edit any widget, find the small pencil icon in the top left or right corner. Drag this icon to move the widget. To edit columns, click the gray and white icon, and to edit the section, hit the blue button with the 6 white dots. You’ll see where you can make edits in the left sidebar.

Each element has 3 main parameters: layout/content, style, and advanced. To see all of your widgets and add a widget, hit the 9 dots in the top left of the sidebar. This will include your standard widgets, Elementor Pro exclusive widgets, and add ons.
Most sites are built using the top six widgets you’ll see where your widget menu is located. These are head honchos, but you can also add other stuff like maps or dividers too.
Elementor Tips: Elementor has a cool right-click function that you can use to edit and move things around as well.
And that’s the basics of Elementor’s layout. Now let’s start structuring a badass website on this beast of a builder.
For our tutorial site here, we’ll start by adding two headings and a button in the top header (we just chose to use one section here), divided by a page divider. Then, we’ll change the height of the section so that it fits the entire screen. Lastly, we’ll add a background image to the section.
You can add a background image by going under the Style tab. Here you can choose the background type and upload the content you desire. Just click on plus buttons to add things and pencil icons to edit – it’s a super intuitive system.
We’re going with the classic background type, and adding an image we have saved on our computer already. We’ll also center our image and add a background overlay. Speaking of which, for high-quality royalty-free images for your site (which you’ll totally need), give Unsplash a visit!

Then we’ll go on to edit the text. Again, look to the Style tab to edit the style of the font for your headings, which includes the color, text-shadow, weight, spacing, and more. In the Content section is where you can change the alignment, size, and the actual text itself.
For our site, we’re choosing some white-centered text. We made the divider smaller, “heavier”, and put that in the center too. Oh, and we’ll change the alignment and words of our button. We also played around with the typography and some other style tools.

If you take a look at the picture, you’ll see an orange button on the page. You’ll also notice that the “hover” tab is clicked in the style editor. As you guessed, yes, you can change both the color of your button and its color when a cursor hovers over it.
A button can also be linked to another page on your site if you add a link in the content section. That’s known as the CSS ID of a page, which we’ll explain in more detail later.
Elementor Tips: To save your work and view what you’ve done thus far, click the green update button near the bottom-left of your page.
With that, we now know how to make a cool hero section for your website! You’ll see in the preview that, so far, that’s all there is to your website since we haven’t added any other sections to the homepage.
Making a website page by page is cool, but perhaps not as easy as installing an already-certified template and editing further from there… and that’s why we’re going to delete everything we’ve built thus far! (seriously)
In the next piece of this Elementor tutorial, we’ll show you how to install a template from which to work, and save yourself a whole lot of time and effort too!
So let’s get back to our WordPress dashboard first and foremost – if you closed the dashboard tab for whatever reason, you can reach it again by going to the top-left Elementor menu and choosing to exit to WP dashboard.

From the dashboard, let’s get a template by going down to the appearance tab, and going down to starter templates to find all of the ones we installed earlier. Again, you can preview whichever of the templates you want, and even import a particular page of a template. Talk about flexibility.
We’ll be going with a template titled “coffee shop” for our site. We’ll install the complete template and wait a few minutes for the process to be complete… and shazam! Just like that, our entire template has been installed!
It looks fantastic and will be a cinch to edit. This is the trick on how to use Elementor templates at a pro-level, taking full advantage of the software’s grace.
So with our template installed, let’s start editing with Elementor, section by section. Click the edit with Elementor button in the top menu to be brought to the Elementor page builder to get started.
We’ll edit the hero section first, which is the big main section you see when you enter most websites. We already reviewed how to change an image in Elementor, so let’s start with that.
If you click the current image under the style tab of the section editor, a new upload will automatically replace what’s already there. So, add an image befitting your website. We’ve added an absolutely delicious-looking burger.

From there we’ll remove the top text on the page, which is actually just text accompanying a divider. You can add text to any divider and adjust the width of the divider (the line) itself too. We’ll also remove the invisible padding to the right of the section.
To do that, we right-clicked the column space and chose to edit the column. Then, in the side tab, we went to the advanced menu and reset all of the padding to 0. We’ll do this so that we can actually center our text, which would not be possible with the additional column padding.
Next, let’s play around with the weight and gap size of our divider, and add in our own site-specific text. And we can center its position too.

Afterward, let’s change the name of our title (that main bit of text there) and poke around with the typography and stuff to make it more sexy. Boom.
And lastly, for this hero section, we’ll edit the button a bit. We think this button is quite attractive as is, so we’ll just center it, change the text and size, and play around with the colors.
We also want this button to link to our contact section, so we’re going to write in “contact” after the hashtag in the content section. How would one know the corresponding keyword when linking buttons, you might ask? Great question – here’s a quick explanation on the topic:
Every section has what’s called a CSS ID (the same one we mentioned earlier). To find the default CSS ID of any section, click on the 6 dots to edit the section, go to the advanced tab, and find the CSS ID input.

The defaults usually make sense, so you can leave them as is or change them if you wish. With the corresponding CSS ID of any section, you can link buttons to go to said section by adding the “name” of the section after a hashtag symbol (for example, #contact, #about).
And that’s all there is to it.
So before moving on to another section, let’s find out how to accomplish the cool parallax effect that comes as a default with this template. We’ll also add in some cool motion effects.
For the parallax, right-click on any part of the section to edit it, and jump into the style tab. There you’ll see an “attachment” dropdown menu with options for “default”, “scroll”, and “fixed”. Setting this to “fixed” is what gives you that parallax, background image effect.
As for motion effects, they can be added to individual widgets or entire columns. We’ll just do the entire column at once. Let’s open up the column editor (that gray box), go to the advanced tab, and go down to “motion effects”.
There are a bunch of effects to choose from here. We’re going with the “fade in” effect, and changing the effect duration to “slow”. So let’s update to save our work and see how everything looks in real-time. If you’ve been following along, your hero section should look pretty damn sweet by now.
And that about does it for our hero section. Let’s move on to the about section next, which falls right under the hero section. We’ll only be changing a few things to this section, one of which involves tampering with the global color settings on this site, which is important to know how to do.
We want to change all of our divider colors to the same color orange to match the rest of the site. Instead of copying and pasting a hex code or guesstimating the color every time to get this effect, we can just change the global color settings.
So first copy the hex code of the pioneering color you want to replicate (from a button or divider or whatever). With that copied, open up the hamburger icon, click on site settings and go into global colors.

They’ll be 4 colors for you to manipulate, all titled differently. Pay no attention to the names here – you can change them to whatever you like. Choose one spot to paste in the hex code of your chosen color, and rename it for convenience if need be.
Update and save your changes, and then, when you go to choose a color for absolutely anything, you can select from the already preset global colors. It helps to make everything coherent and speeds up the workflow.
For more on website color schemes, why they’re really important, and how to finesse them like a real G, check out our article on the subject!
Now that we’ve set up our colors, let’s change the divider color to the same orange we used for the button (of course, this is at your discretion.) and throw in another background image.
And we’ll leave the columns more or less the same, minus changes in the bodies of text themselves. And the about section is complete.
The next section, the testimonials section is where you’d actually copy and paste testimonials from customers or partners. Since we don’t have actual testimonials for this gimmick business, we’re just going to make one up for now – feel free to do the same!
By clicking on the icon in the top column (the big quotation marks), you can replace and/or edit the icon however you choose. You can also choose to add a video to this section instead of an image, which is what we’re gunning for.
To accomplish this, just go to the background type under the style tab and change it to video. Then insert the link to a YouTube or any other video where it requests, and it’s done. You can even edit the start and end times and whether or not the video plays just once, or repeats.

Sweet. So with testimonials down, let’s get to our menu section. Now, this menu section is essentially just a photo gallery. If you’re not in the food business, you could always change this to the “project” or regular “gallery” section and insert corresponding images.
Funny enough, we’re gonna delete this entire gallery because we want to show you how to make what’s called a filterable gallery which is a million times cooler than plain-ol’ static photos on the page. The top two header texts will stay.
Once that’s cleared away, click on the Rubix cube icon to get back to your collection of widgets and search for “filterable gallery”. Then drag and drop it right under the subtitle of this section.
This kind of gallery is cool since the image description only pops up when you hover over the image, allowing for both flexibility in description and a cleaner-looking gallery. You can also create different filters for your gallery, like “food” or “drink” filters, so maneuvering becomes effortless.
You can edit these tabs by adding items to your gallery under the filterable controls. It’s pretty straightforward.
Among all the other augmentable parts for your filterable gallery, one worth mentioning is the “link to” section under the content tab. Leaving these set to “buttons” (the default) will leave those 2 icons/buttons on each space for a new image.
The one to the left is called lightbox and just brings the image to the front so you can see it better and scroll through more easily. The other is a link icon that can link to any onsite location of your choice, which you can find hiding within the “gallery items” tab under the “gallery name” of the items.

Under the “gallery items” tab is also where you’ll insert each individual image. Where it says control name is actually where you’ll write the name of the filter that image falls under, so if it’s a picture of food and you have a filter titled “food”, that’s what you’d write as the control name.
Just make sure all the letters line up exactly – the case doesn’t matter.
We went ahead and created a simple gallery with the filters “food” and “drinks”, with all of our images on one page (look at the items to show number) and some thicker padding for visual effect:

Sweeter than words can explain.
Moving on, the following newsletter section is pretty straightforward minus one thing – WP forms. If you look closely, you’ll see a small box icon in this section. Clicking on it brings up the Edit WPforms menu.
This is a contact form widget back on our WP dashboard which came downloaded with this template, ever so conveniently. You can also change this form to a newsletter signup form which also comes pre-downloaded with the template and is super handy for getting customer info.
To edit all of your contact forms, go to WP Forms in your WordPress dashboard and go to all forms. You’ll see any and all forms you’ve created thus far. Click on one to go into it and make changes therein. It’s that easy.

Following this will be another testimonial section, which you can choose to keep or remove since we’ve already got another smaller testimonial section on our site. Below that is an image carousel, and even further down at the bottom will be a contact section.
We’ll keep the contact section exactly as is because it looks pretty good. One quick tip about the image carousel: if you click on the images in the carousel edit, you can change/rearrange the image order by just dragging and dropping them.
And with that, we’ve pretty covered the essentials on how to customize a website with Elementor in WordPress!

Step 6: Edit Your Header & Menu
The final steps are not to be overlooked but are edits to be made in Astra itself and not Elementor. First up, the header.
To edit your website header in WordPress, go to your dashboard, go to appearance and go down to customize. And it’s best to open this page up on a new tab.
A customization page will pop up with permissible edits only in the header area of your newly crafted website–just what we need.
The entire header area is a grid that you can move widgets inside of using a drag-and-drop feature, just like Elementor. The grid on the bottom corresponds to the area of the header. Opening up the header builder will enable header customization.
The first and probably most important piece of the header to get poppin’ is your logo – you’ll want to insert your own personal logo which reflects your business and brand.
If you don’t have a logo yet, it’s super easy to create one for free over at Fotor. You can create and save a logo, and download it as a low-resolution file (just fine for us) all at the low price of $0.
Once you have your logo saved, go into site identity & logo in the header builder and upload your logo there. At the very bottom here you can also choose your site’s icon (also known as a favicon) which will appear in your browser tab and make locating your site easier.

Pro tip: It\'s damn near impossible to distinguish dark logos on transparent headers with dark backgrounds. If you have a logo and by chance will use it atop a transparent header, be sure to create a duplicate header with all dark/black lines or words converted to white instead.
This header builder actually has an option to use a special logo image for any pages on your website which may have a transparent header which is sweet.

To edit the main menu or navigation menu, you can either click on the pencil icon in the menu itself, click on primary menu in the bottom half of the builder, or click on primary menu in the side tab editor.
From there, you can go into the design tab to make changes to the hover style, color, and things like that. The button in this navigation menu can be edited in the exact same way as the primary menu by way of the corresponding pencil icon and button menus.
As far as editing the navigation menu items themselves, jump back out of the header builder and scroll down to menus.

Since we uploaded a template to work with, the default menu will automatically be linked to each respective section of our website. Easy! But you can always edit names or remove items at your discretion.
We’ll be removing the “contact” and “gallery” menu links, since we don’t have a gallery and our customized button takes care of “contact” prompting.
Don’t forget to publish to save your work!

Step 7: Mobile Responsiveness
Mobile responsiveness is just making sure your website looks good on different devices, like a mobile phone or tablet. To check this out from the WP dashboard, go to visit my website to open up your site, and then go to edit with Elementor.
Way down at the bottom of your site next to the Update button will be an icon that reads Responsive Mode.

Since we’re using a template, it’ll be easier for Elementor to successfully automatically compress the site into a mobile form (but sometimes they fudge it up a lil’).
Elementor Tips: For the most part, any changes you make in the mobile version will have absolutely no effect on the desktop version. For certainty with this, look for the small mobile phone icon before editing things in responsive mode!
Usually, you’ll only have to make adjustments in the text sizing, section/column padding, and margins to get a crispy clean mobile rendition of your undoubtedly already splendor website.And that’s the end of our step-by-step tutorial on how to create a website using Elementor with WordPress! For a competitive perspective, check out our Divi vs Elementor post and see how two of the best page builders go toe to toe!