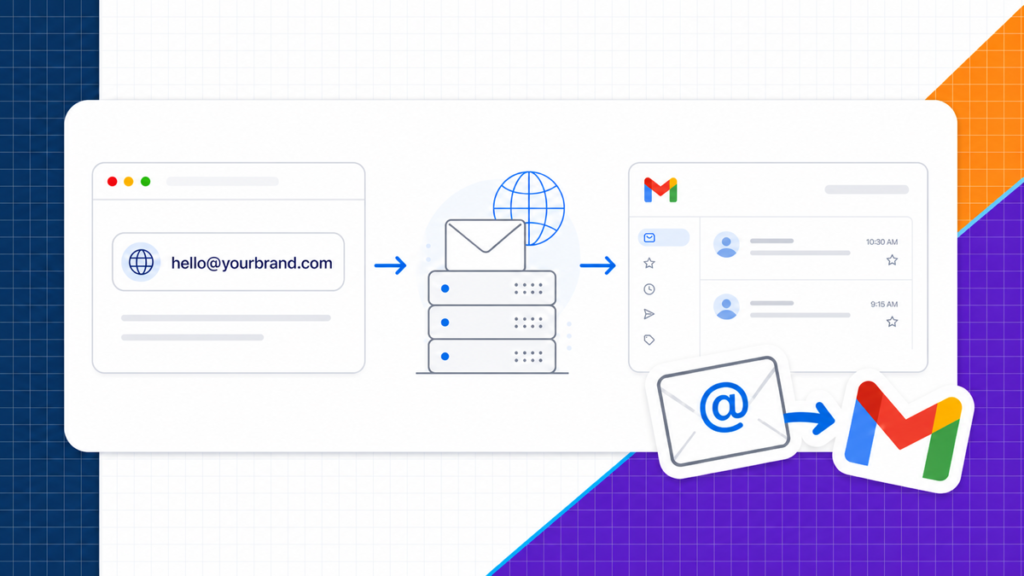
A custom-domain email address gives you something like hello@yourbusiness.com instead of yourbusiness@gmail.com. It looks more professional, keeps the brand consistent, and makes it easier for customers to trust that a message really came from your business.
You can still manage that address with Gmail, but the old free setup changed. Gmail no longer lets new users pull mail from another provider through the desktop Check mail from other accounts POP feature. The current no-extra-cost method is to forward incoming mail from your email provider into Gmail, then use Gmail's separate Send mail as feature with your provider's SMTP server.
Dont follow an old POP tutorial for a new setup. Google is retiring Gmail's desktop POP fetching for outside accounts. New setups should use automatic forwarding on the web or add the mailbox to the Gmail mobile app with IMAP. Existing POP users should plan to move before support ends.
This guide shows exactly what still works, what's genuinely free, and when paying for Google Workspace is the better business decision.
The three ways to use a custom domain with Gmail
The phrase “Gmail custom domain” gets used for three different setups. They look similar from the customer's side, but they work differently behind the scenes.
| No-extra-cost path Forwarding + SMTP | Google Workspace | Gmail mobile + IMAP | |
|---|---|---|---|
| Gmail on the web | One Gmail inbox | Fully native | Not included |
| Gmail mobile app | Forwarded inbox | Fully native | Direct mailbox |
| Incoming mail | Provider forwards it | Google hosts it | App syncs with IMAP |
| Outgoing mail | Provider SMTP | Google sends it | Provider SMTP |
| Extra subscription | Not if email is included | Yes | Not if email is included |
| Best for | Solo business on desktop | Teams and critical email | Simple mobile access |
Swipe to compare more options. Forwarding + SMTP stays pinned.
Forwarding plus SMTP works well for a solo business when a mailbox is already included with hosting. Google Workspace is the cleaner long-term system for teams.
My recommendation is simple. If you run a solo business and your hosting already includes email, start with forwarding plus SMTP. If email is mission-critical, several people need shared access, or you want Gmail to host the mailbox directly, use Google Workspace.
The honest trade-off
Using free forwarding instead of Google Workspace
Why it works
- No second inbox to watch New messages can arrive in the personal Gmail inbox you already use.
- No separate email subscription The setup can cost nothing extra when your hosting plan includes a mailbox.
- You can send from the branded address Gmail's Send mail as option uses your provider's SMTP server for outgoing messages.
Where it is limited
- It's not native Google Workspace The mailbox still lives with your email provider, and Gmail is acting as the interface.
- Sent mail can live in two places Depending on the provider and client, the provider's Sent folder might not mirror Gmail perfectly.
- More moving parts Forwarding, SMTP, DNS authentication, and Gmail each need to be configured correctly.
If you don't have a domain yet, start with our domain registrar guide. If you are also building the website, the business website guide covers the complete path from domain to launch.
What you need before starting
A professional address needs three separate pieces. Your domain is the part after the @ symbol. Your email host stores and sends the messages. Gmail is the interface you want to read and write from.
- A domain you control: for example, yourbusiness.com.
- An active mailbox or email-routing service: supplied by your host, a dedicated email provider, or Google Workspace.
- Access to the domain's DNS: needed for MX, SPF, DKIM, and DMARC records.
- A personal Gmail account: the inbox that will receive forwarded messages.
- The email provider's SMTP settings: server, port, encryption, username, and mailbox password.
Your website host and email host don't have to be the same company. Keeping them together is easier for a beginner, but the domain can point web traffic and email traffic to different services.
If those terms are new, read how web hosting works before changing DNS. Our hosting comparison also explains which providers make the full setup easiest.
A note about the CAPW video
This CAPW walkthrough still gives you a useful look at creating a Hostinger mailbox and connecting the outgoing address to Gmail. The incoming POP portion is from the earlier Gmail workflow, so skip that section and use the forwarding or mobile IMAP steps in this article instead.
The screens inside hPanel and Gmail may move around, but the current structure is the same: create the mailbox, authenticate the domain, forward incoming messages, connect outgoing SMTP, and test both directions.
1. Create the professional mailbox
I use Hostinger in this walkthrough because it's beginner-friendly and keeps the website, domain, and email controls in one dashboard. Some hosting plans include an email offer or trial, while others require a separate email plan. Confirm what your account includes before building the address.
In hPanel, open Emails, choose the domain, and create a mailbox such as hello@yourbusiness.com, support@yourbusiness.com, or your own name. Use a unique password and save it in a password manager.
This clip shows the mailbox-creation form from the CAPW walkthrough. The current labels may look a little different, but the information you enter is the same.
Start with one real mailbox rather than five aliases. A simple hello@ or yourname@ address is enough for a solo business. Add support, billing, or team mailboxes when another person or workflow genuinely needs them.
Already have hosting somewhere else? Use that provider's mailbox instructions instead. The Gmail steps below work with any email service that supports automatic forwarding and authenticated SMTP.
2. Authenticate the domain before sending
Before connecting Gmail, confirm that the email provider has configured the domain's MX, SPF, and DKIM records. MX tells the internet where incoming mail should go. SPF and DKIM help receiving providers verify that your service is allowed to send as your domain.
Add a basic DMARC record after SPF and DKIM are working. DMARC tells receiving servers what to do when a message fails authentication and gives you a foundation for monitoring spoofed mail. Your provider should supply the exact record values, so copy them from the current email dashboard instead of borrowing DNS records from another tutorial.
Never publish two separate SPF records. If the domain already has SPF, the new sending service usually needs to be added to the existing record. Two competing SPF records can make legitimate mail fail authentication.
Google's sender requirements make authentication important even for small senders. At minimum, messages sent to Gmail accounts need SPF or DKIM, and using both plus DMARC gives the domain better protection and a cleaner path to the inbox.
3. Forward incoming mail to Gmail
Inside your email provider, find Forwarders, Email forwarding, or the forwarding option attached to the mailbox. Create a forward from the custom address to your personal Gmail address.
- Forward
hello@yourbusiness.comto the Gmail address you actually monitor. - Keep a copy in the original mailbox only if you want a second backup and have enough storage.
- Send the verification message if the provider asks you to confirm the destination.
- Test from a third address, not from the Gmail account receiving the forward.
The test message should appear in Gmail with the original sender and your custom address in the delivery details. If it doesn't arrive, verify the forwarding rule, check spam, and confirm the domain's MX records point to the email provider.
Forwarding handles incoming mail only. You still need the Send mail as setup below, otherwise replies may leave from your personal @gmail.com address.
4. Add the custom address to Gmail for outgoing mail
First, collect the provider's current SMTP settings. For Hostinger Email, you can find them under Emails → Manage → Connect Apps & Devices. Gmail needs the outgoing server, encrypted port, full email address, and mailbox password.
The configuration screen below is where the video collects those connection values. Copy them from your own account because providers can use different servers and ports.
Now open Gmail on a computer and go to Settings → See all settings → Accounts and Import. Under Send mail as, choose Add another email address.
- Enter the sender name customers should see.
- Enter the full custom-domain email address.
- Use the provider's SMTP server and encrypted port.
- Use the full custom email address as the username.
- Enter the mailbox password and keep the secured connection enabled.
Gmail then opens the verification step shown here. Because incoming forwarding is already working, the confirmation message should arrive in the Gmail inbox.
Open the verification message and use the link or code. Back in Accounts and Import, set the branded address as the default if you want new messages to use it automatically. Also select Reply from the same address the message was sent to.
5. Add the mailbox to the Gmail mobile app with IMAP
If you want direct mailbox sync instead of forwarding, the Gmail app on Android, iPhone, and iPad can add the custom address as another account using IMAP. This doesn't turn it into a Google Workspace account, but it lets the Gmail app read and send through the provider directly.
Choose Add another account → Other, enter the custom email address, and use the provider's IMAP and SMTP settings. IMAP keeps folders and read status synchronized with the server, which is better than the old download-style POP workflow.
Use forwarding for the Gmail website and IMAP for direct mobile access. They solve different parts of the problem, and both avoid relying on Gmail's retired desktop POP fetching.
6. Add a signature and secure the accounts
Create a short signature with your name, role, business, website, and one useful contact method. Don't turn it into a banner ad. A simple signature looks more professional and is less likely to create formatting problems in replies.
Turn on two-step verification for Gmail and for the hosting/email account. Use a unique mailbox password, protect the domain registrar account, and limit who can change DNS. The domain and email accounts are part of the same trust chain.
If you're building the website at the same time, the website setup guide gives you the broader launch sequence, and our Hostinger review explains the dashboard and hosting trade-offs.
7. Test the entire email path
Don't stop after Gmail accepts the SMTP credentials. Use a separate outside address and test the experience the same way a customer will.
- Inbound: send to the custom address and confirm it reaches Gmail.
- Outbound: compose in Gmail and choose the custom address in the From field.
- Reply: reply to an inbound message and confirm the branded address stays selected.
- Authentication: open Gmail's Show original view and confirm SPF, DKIM, and DMARC pass where configured.
- Spam placement: check that messages arrive in the inbox at Gmail and another major provider.
- Identity: verify the sender name, From address, Reply-To address, links, and signature.
The setup is finished only when a complete conversation works. Send in, reply out, reply back again, and inspect every address along the way.
When Google Workspace is worth paying for
Free forwarding is fine for a one-person business that sends ordinary one-to-one email. Google Workspace becomes the better choice when several people need mailboxes, calendars, shared files, admin controls, recovery, or a dependable native Gmail experience.
I would also choose Workspace when email downtime would stop the business. One provider owns the mailbox and Gmail interface, which removes the forwarding and third-party SMTP layers. The monthly cost is easier to justify once the business depends on email every day.
Gmail custom-domain FAQ
These are the practical questions that come up most often with the current setup.
Frequently Asked Questions
Can I use Gmail with my own domain for free?
You can use a personal Gmail inbox with a custom address at no extra email cost when your hosting includes a mailbox. Forward incoming mail to Gmail and use the provider's SMTP server through Gmail's Send mail as feature. The domain and hosting themselves aren't free.
Did Gmail remove Check mail from other accounts?
Google is removing Gmail's desktop POP fetching for outside accounts. New users can no longer build the old setup. Use provider-side automatic forwarding for Gmail on the web or add the account to the Gmail mobile app with IMAP.
Do I need Google Workspace for a professional email address?
No. Any reputable email host can create an address at your domain. Google Workspace is the paid option that hosts the mailbox directly inside Gmail and is usually the cleanest choice for teams.
Can Gmail still send from my custom email address?
Yes. Gmail's Send mail as feature supports a custom address you own. Connect it with the SMTP server, encrypted port, username, and password supplied by your email provider, then complete Gmail's verification.
Is email forwarding the same as a mailbox?
No. A mailbox stores messages and supplies outgoing SMTP. A forwarding rule only redirects incoming messages to another destination. The no-extra-cost Gmail setup usually uses both.
Should I use POP or IMAP in the Gmail app?
Use IMAP when adding the mailbox to the Gmail mobile app. IMAP keeps messages and folders synchronized with the provider. The retired Gmail feature was desktop webmail fetching from outside accounts with POP.
Why are messages from my domain going to spam?
Check SPF, DKIM, and DMARC first. Then confirm the SMTP server matches the service authorized in DNS, the From address uses your domain, and the sending account hasn't been compromised or used for bulk mail.
Can several people share the same custom address?
You can forward an address to multiple people, but shared replies and message history quickly become confusing. For a real team, use individual mailboxes, a shared-inbox tool, or Google Workspace with proper admin controls.
Final recommendation
For a solo business, start with the email service already included with your hosting. Create one branded mailbox, forward incoming messages into Gmail, connect outgoing SMTP through Send mail as, authenticate the domain, and test the complete conversation.
If the business grows into a team or depends heavily on email, move to Google Workspace or another dedicated business-email platform. The free setup is a useful starting point. It shouldn't become a complicated system you're afraid to touch.
Need the website and domain first? Follow the complete business website guide and return here when the domain is live.