You are building
How to Make a Portfolio Website (2026)
Build a site that ranks under your name and makes it effortless for clients to hire you.
Before anyone hires you, they Google your name. If what comes up is an Instagram grid, a Linktree, or a Behance profile buried next to a thousand other designers, you’ve already lost the first impression. Let’s fix that!
Below, we’ll show you how to build a portfolio website that’s clean and professional on your own domain using WordPress. Your work front and center, your contact form one click away, and your name ranking in Google instead of someone else’s platform.
The niche doesn’t matter. For designers, photographers, developers, writers, consultants, etc… the setup is the same. We’ll cover everything from picking your website host to building your work gallery and writing case studies that actually win clients.
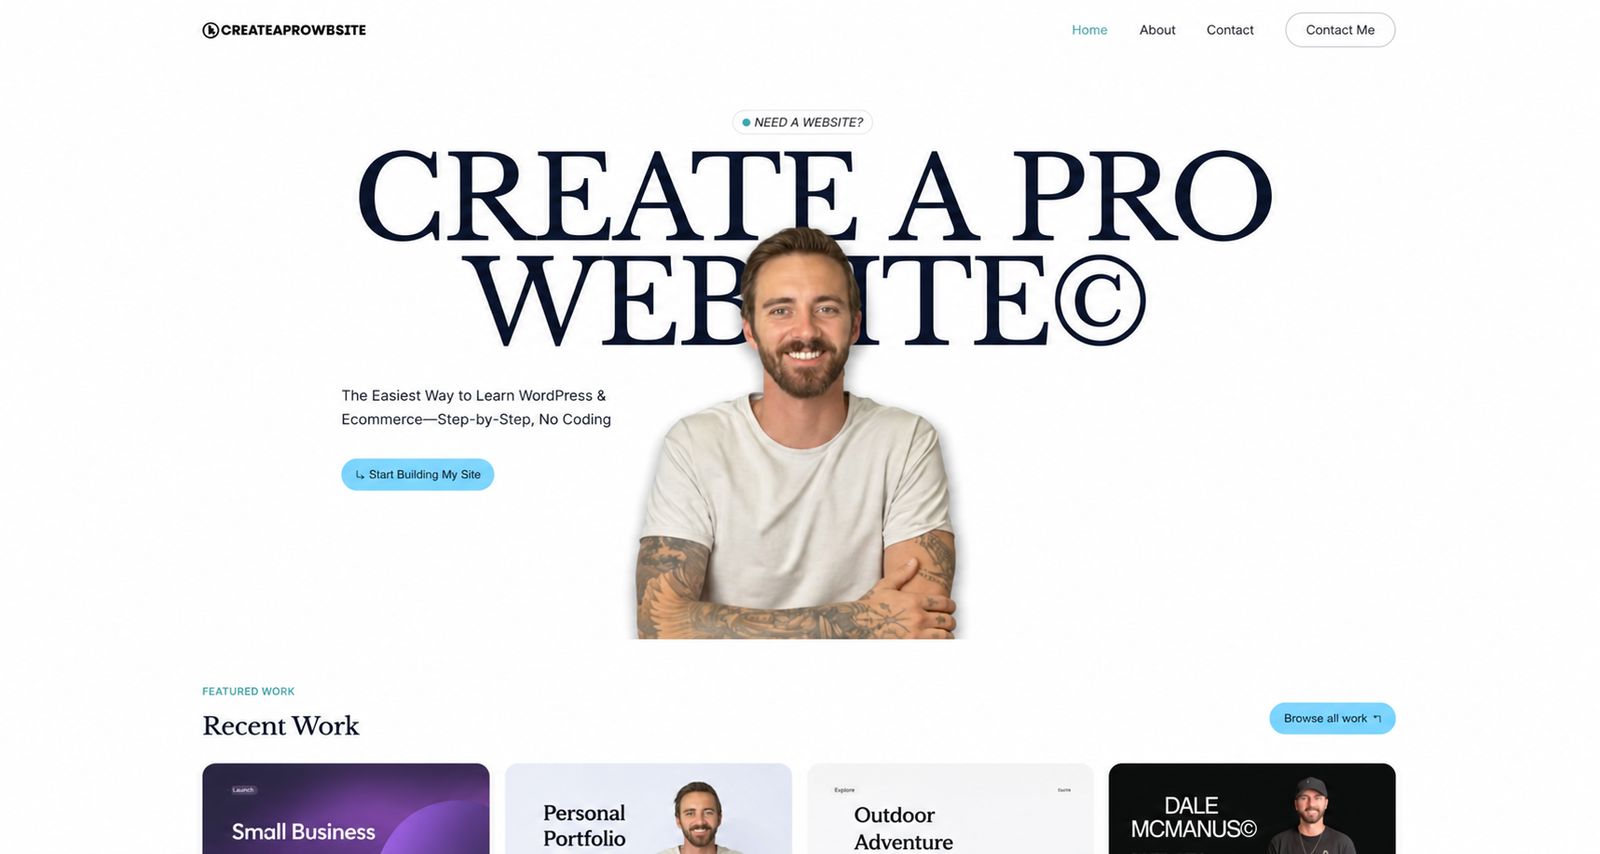
Here’s what the finished portfolio looks like:
Pick Your Platform: WordPress
Why WordPress beats Adobe Portfolio and Linktree
Every portfolio needs a platform. This is the software your site runs on. Your choice determines where your work lives online, who owns your SEO, and how much control you have over how clients experience your work.
Adobe Portfolio is free with Creative Cloud, but your site is on adobe.com, not yours. Behance puts your work next to every other designer in your niche. Linktree is a list of links, not a portfolio. None of them rank under your name (or business name) in Google.
A WordPress portfolio on your own domain ranks under your name in search, builds domain authority you keep forever, and gives you full control over layout, case studies, and inquiry flow. The cost is about $3 a month.
| Our pick WordPress | Adobe Portfolio | Behance | Squarespace | Linktree | |
|---|---|---|---|---|---|
| Overall rating | |||||
| Setup effort | Easy (via host) | Very easy | Instant | Easy | Instant |
| Custom domain & SEO | Full ownership | On adobe.com | On behance.net | Full ownership | On linktr.ee |
| Design flexibility | Unlimited | Limited templates | Fixed layout | Polished templates | Very limited |
| Monetization control | Full control | None built-in | None | Built-in commerce | Link-only |
| Client inquiry tools | Full contact forms | Basic contact only | DMs only | Good forms | Link only |
| Pricing model | ~$4/month hosting | Free with Creative Cloud | Free | $16–65/month | Free / $5+ month |
| Best fit | Long-term professional | CC subscribers | Discovery only | Simple portfolios | Link hub only |
Swipe to compare more options. WordPress stays pinned.
Ranking emphasizes long-term ownership, SEO control, and client acquisition capability.
Which Platform Is Right for You?
- WordPress (what this guide is built on): your domain, your SEO, full design control. ~$3/month hosting.
- Adobe Portfolio: free with Creative Cloud, but lives on adobe.com. No custom plugins, no email list path.
- Behance: great for community discovery. Your SEO goes to behance.net. No inquiry pipeline.
- Linktree: a link hub, not a portfolio. No pages, no case studies, no SEO.
Most creatives use Behance or Adobe Portfolio for community discovery and their own site for actually closing clients. Both serve different purposes, this guide builds the one that does the serious work.
Sign Up for Hosting and Register Your Domain
Your work needs a home
Your domain is your permanent professional address. For example, yourname.com or yourstudio.com. A custom domain is the single biggest credibility signal a creative can have: clients notice the URL, and yourname.com reads very differently from yourname.adobe.com or yourname.myportfolio.com.
Go to Hostinger via our discount link so the coupon code applies automatically at checkout. On WordPress.org, click Hosting in the menu, and you’ll see WordPress’s official list of recommended providers. Hostinger is on that list. That’s why I use it on every portfolio build.
Hostinger includes a free domain, free SSL, and automatic WordPress install. Our link applies the discount at checkout automatically, no code needed.
Back on Hostinger, choose the Business plan. This will cost about $3–4/month with a free domain for year one, and a free CDN that keeps an image-heavy portfolio loading fast. Set a billing cycle of at least 12 months, then complete checkout.
Claim your domain name inside the setup wizard in Step 2, not in the plan checkout search bar.
Think long-term with your domain. If you photograph weddings today but plan to expand into brand photography, a domain based on your name/business name gives you room to grow without changing your URL and losing SEO value. A niche domain is harder to pivot from.
Register Your Domain and Install WordPress
Your address and dashboard
After checkout, the Hostinger wizard starts automatically.
Next, claim your free domain. Choose yourname.com if it is available. If not, try yourstudioname.com or add “design,” “photo,” or “studio” as a suffix. I recommend you avoid .net or .co if .com is available because mistyped extensions send visitors to someone else’s website.
Hostinger installs WordPress automatically. When it finishes, click Go to Admin Panel, or navigate to yourdomain.com/wp-admin and log in with the credentials you set up. Bookmark this URL. This is where you build and manage your entire site.
The left sidebar is your control panel. Hover over each section, Pages, Appearance, Plugins, Settings, and spend a minute getting oriented before you start building.
Install Astra and Import a Portfolio Template
A layout for your work
Go to Appearance → Themes, search for Astra, install it, and click Activate. Then open Appearance → Starter Templates. If Starter Templates is not listed, install it as a plugin under Plugins → Add New first.
In Starter Templates, click the back arrow if prompted and select Elementor as your page builder. This step is easy to miss, but choosing the wrong builder imports a template built for a different editor and the layout will not work correctly.
Filter templates by Portfolio or Personal. Portfolio templates lead with gallery grids, minimal navigation, and personal-brand layouts. Browse a few, preview the one that fits your vibe, and click Submit and build my site.
Astra installs your Work page, About page, Contact page, and homepage in about one minute. Once the import finishes, go to Pages, open your homepage, and click Edit with Elementor.
Customize Your Homepage in Elementor
The first impression clients see
Click any element to select it. Clicking text lets you edit it inline. The left panel shows style settings for whatever is currently selected. Start with your hero section. Replace the placeholder headline with a clear statement of what you do and who you work with.
Specificity tells a potential client exactly whether they are in the right place. Vague headlines make visitors scroll to figure it out, and most will not. “Brand identity for food and beverage startups” beats “Creative Designer Based in New York” every time.
Transparent PNG images look great in hero sections, and they give your work a clean product-style presentation with no background to fight. Here’s how to position one in Elementor.
Elementor does not auto-save. Hit Publish every few minutes while editing. This is especially important before switching to a different page or navigating to the WordPress dashboard. An accidental browser refresh will wipe any unsaved changes.
Build Your Work Gallery
Show only your strongest work
Upload your curated projects at 1200–1600px wide instead of full-resolution originals. Compress images first using Squoosh (free, browser-based) or TinyPNG. A fast-loading gallery is more likely to keep visitors on the page. A slow one sends them back to Google before they’ve seen your best work.
Enable lightbox on your gallery widget so visitors can click through to full resolution without leaving the page. If you work across multiple specialties (e.g. branding, web, print, or photo) add category filter tabs so each type of client finds relevant examples immediately.
Pin your most impressive, most relevant project first regardless of category filters. That is what every visitor sees in the first three seconds. Make it your undeniable best work, not your most recent.
Write Case Studies That Win Clients
Turn projects into proof
A gallery shows what you made. A case study shows how you think, and thinking is what clients actually pay for. Build at least two full case studies using this four-part structure.
- The brief: what the client needed, in one paragraph
- The challenge: what made this project interesting or difficult
- Your solution: what you did and why, with process visuals
- The result: outcome, ideally with specifics. For example, “40% increase in inquiry rate” or “launched in 3 weeks under budget”
Each case study lives on its own page. Build the layout in Elementor with a clear reading flow. Use large project title, visuals, and text sections alternating with images. Link each gallery thumbnail to its corresponding case study page so interested clients can dig deeper without having to search.
Build an About Page That Converts
Why clients should trust you
Your About page is the most-visited page on most portfolio sites, after the homepage. It needs a real photo of you. People hire people, not logos. A face on the page builds trust faster than any copy ever will.
In two or three paragraphs tell people who you help, your background, and why you care about this work. End with one CTA leading to your inquiry form. A circle-cropped headshot looks clean and professional in Elementor. Apply it under Advanced → Mask → Circle.
If you can’t share client names due to an NDA, use industry labels: “SaaS startup — brand identity” or “NYC restaurant — photography.” The work speaks for itself; the label adds just enough context without breaking confidentiality.
One Inquiry CTA, Everywhere
The action visitors should take
Pick one primary action for you CTA and use it consistently on every page. For example, “Work With Me,” “Start a Project,” or “Get in Touch.” Place your CTA at the end of every case study, bottom of About, in the sticky header, in the mobile menu, etc… Clients who visit three or four pages are already interested. Make sure there’s always a button within reach when that decision moment arrives.
In Elementor, build the button with a distinct hover state. A grow animation on hover looks polished without being distracting. Here’s what that looks like in practice.
Connect the button to the contact form on your Contact page. Open the page in Elementor and confirm the form fields capture what you need: name, email, project type, and timeline.
Before you launch, open the form notification settings and confirm submissions route to the inbox you actually check. Send yourself a test inquiry from the live page to be sure it arrives.
Don’t put five competing CTAs on the same page (e.g. Instagram follow, rate card download, Calendly link, email, and a contact form) all at once. Every competing option reduces the chance a visitor takes any action. One clear CTA per page wins every time.
Portfolio Examples and Design Polish
Make the details feel intentional
Before you launch, look at what strong portfolio sites have in common. The best ones share a handful of design decisions applied consistently: generous padding around project titles (80–120px top and bottom), a three-color palette used throughout, clean typography at 17–18px body size, and subtle motion on key elements without gimmicks.
A 3D tilt or scroll motion on a hero project image creates depth and premium feel without heavy design work. In Elementor (Pro), this lives under Motion Effects → Mouse Effects → Tilt.
This is why my websites always look premium. Simple details separate a template that looks like a template from one that looks like a custom build.
Mobile Gallery Check and Launch
Final checks before sharing
Galleries break on mobile more often than any other site element. That’s why it’s best to check your gallery on mobile before you go live.
In Elementor’s mobile view, switch image display to Object Fit: Contain so nothing crops unexpectedly. Multi-column grids should drop to a single column. CTA buttons should be centered and large enough for thumbs.
Test on a real phone, and not just a browser resize. Tap through the gallery, open a case study, and try submitting the contact form. The mobile experience is often where portfolio sites fall apart, and it is what a hiring manager or client sees when they pull up your link from their phone.
Use this launch checklist before you share your link:
- 6–12 projects live with at least 2 full case studies
- About page has a real photo of you and a CTA at the bottom
- Contact form tested with a real message submitted and confirmed delivered
- One consistent CTA label used throughout (not three different phrasings)
- Custom domain connected and live; not a staging subdomain
- Gallery and contact form tested on a real phone
- No placeholder text remaining anywhere
Frequently Asked Questions
What should a portfolio website include?
At minimum you should have a homepage with featured work, a Work or Projects page, an About page with your photo and story, and a Contact page with a form. Case studies and testimonials convert significantly better than a gallery alone. Start with the minimum and add depth as you land more projects to showcase.
How many projects should I show?
6–12 of your best projects. Always choose quality over quantity. A portfolio of 8 excellent projects converts better than 40 average ones. Potential clients scan and decide in seconds; they don’t have time to scroll through everything you have ever made. Edit your own work ruthlessly. This signals taste and judgment before prospects hire you.
WordPress portfolio vs Adobe Portfolio: which is better?
Adobe Portfolio is quick to set up and free with Creative Cloud. It’s great for getting something up fast. But your site lives on adobe.com (not your domain), you cannot add custom plugins, there is no contact pipeline, and no path to build an email list. A WordPress portfolio on your own domain owns the SEO, gives you full design control, and costs about $3/month to host. Most creatives start on Adobe Portfolio and migrate once they are serious about landing clients or building a business from their work.
Do I need a custom domain for my portfolio?
Yes! yourname.com signals professional intent in a way that yourname.myportfolio.com or yourname.wixsite.com never will. Most hosting plans include a free domain for year one. The cost difference is minimal and the credibility difference is significant. Clients and hiring managers notice the URL.
Should I put pricing on my portfolio?
Fixed packages (“logo design from $800”) filter out unqualified leads and save you time on discovery calls. Custom project work can use “Starting at $X” or “Contact for a quote.” The right answer depends on your practice. However, pricing of any kind attracts better-fit clients than not including any pricing because it filters out people who were never going to convert anyway.
What Your Portfolio Website Actually Needs
A portfolio website has one job: answer “Can this person do what I need?” before a potential client or employer gets on any call. Three pages and one CTA done well handle everything.
- Work / Projects: your curated gallery of best work, with category filters if you work in multiple areas
- About: your photo, story, who you help, and one CTA at the bottom
- Contact: a simple inquiry form that captures name, email, project type, and timeline
The homepage ties all three together. Pick your six best projects and commit to showing only those for now. A tight portfolio signals confidence. A bloated one signals you can’t edit your own work, and that’s the first impression a client takes into a hiring conversation.
You’re Live. Now Get Clients.
That’s the complete setup: WordPress, Astra, Elementor, and a portfolio that ranks under your name, showcases your best work, and makes it effortless for potential clients to reach you.
The most common mistake after launch is waiting for clients to find you. Send the link. Add it to your LinkedIn, your email signature, your Behance bio. Every proposal you send should include it. The site does the heavy lifting once people land on it, but you have to put it in front of them first.
Then come back and add a second case study. Then a third. The portfolio that wins work six months from now is the one you kept updating after launch. Start with what you have, publish it, and build from there.